Wednesday, October 14, 2009
Tuesday, October 13, 2009
Softcover 7"x5" Magic!
It's so awesome that this new StoryBook Creator Plus 3.0 has the option enabling one to personalize the 7"x5" paper covers! I'm so glad for this feature, as I really like personalized StoryBook covers. Want a special photo on the cover of your book? It's easy with StoryBook Creator Plus 3.0!
Exciting New Text!
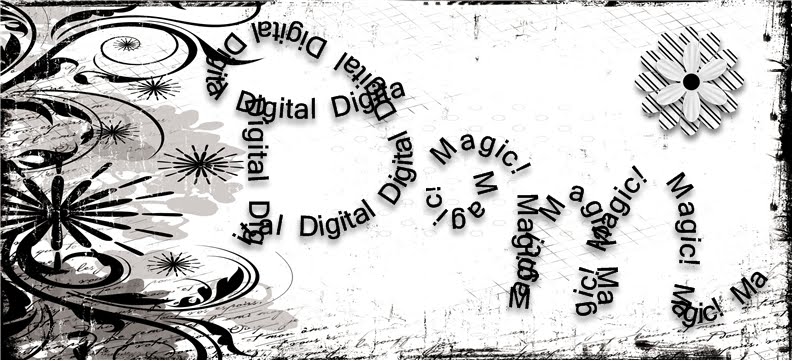
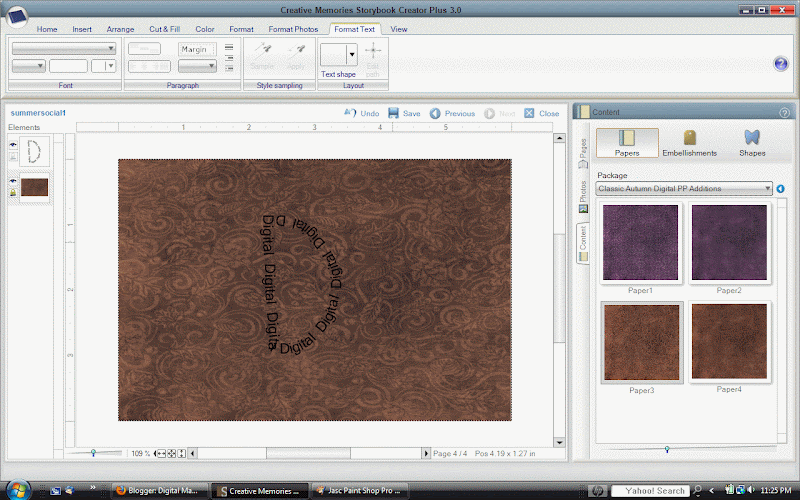
I've finally been playing more with StoryBook Creator Plus 3.0's new features. I just LOVE the new text features! For example, the Digital Magic! logo I made: With the new text tool, I wrote a cursive "D" for the text box shape, and typed "Digital" in for the text. Then, I did the same for the "M", typing in the word "Magic!". It looks fabulous! I'm in love with this new feature alone, not to mention all the other new features in 3.0. Here's how you can make a text box in the shape of a "D" and fill it with the word "Digital":
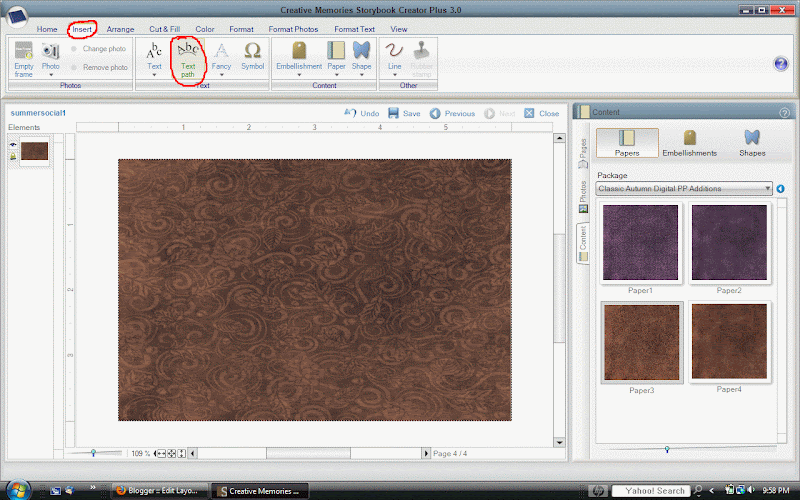
Step 1: First click on the "Insert" tab at the top of the page, then click on "Text path" in your Text toolbar:
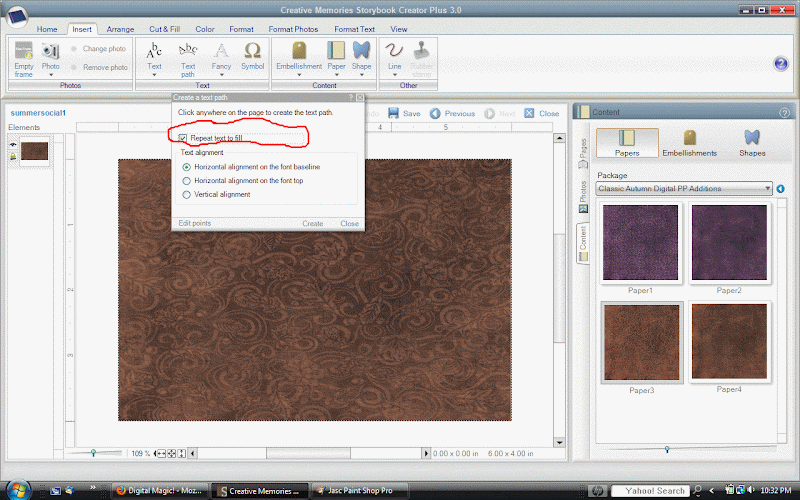
Step 2: Make sure you check the box by "Repeat text to fill":
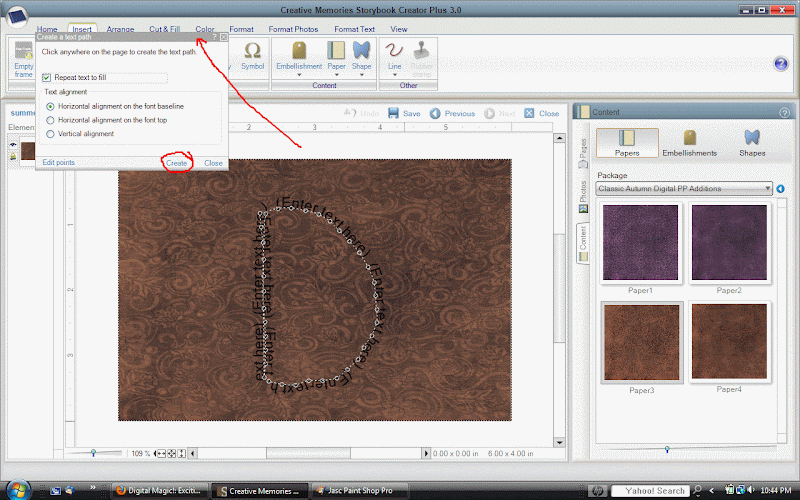
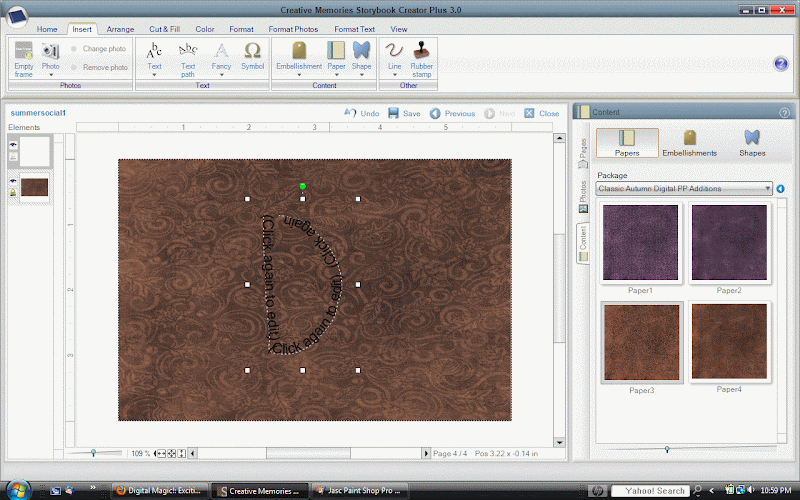
Step 3: To move the pop-up box out of your way so you can work on your page, left-click on the top gray area of the box and drag it up and over. Next, holding down the left mouse button, draw the letter "D". I should insert here that I had to draw the straight line of the letter, then instead of starting at the top of the line, like we were all taught to do, I started at the bottom of the line and drew the curve up to the top of the straight line. That way, my text won't overlap. When you're through drawing your shape, click on the word "Create" at the bottom of the pop-up box:
Step 1: First click on the "Insert" tab at the top of the page, then click on "Text path" in your Text toolbar:

Step 2: Make sure you check the box by "Repeat text to fill":

Step 3: To move the pop-up box out of your way so you can work on your page, left-click on the top gray area of the box and drag it up and over. Next, holding down the left mouse button, draw the letter "D". I should insert here that I had to draw the straight line of the letter, then instead of starting at the top of the line, like we were all taught to do, I started at the bottom of the line and drew the curve up to the top of the straight line. That way, my text won't overlap. When you're through drawing your shape, click on the word "Create" at the bottom of the pop-up box:

Step 4: Now, click anywhere on the text in the box:

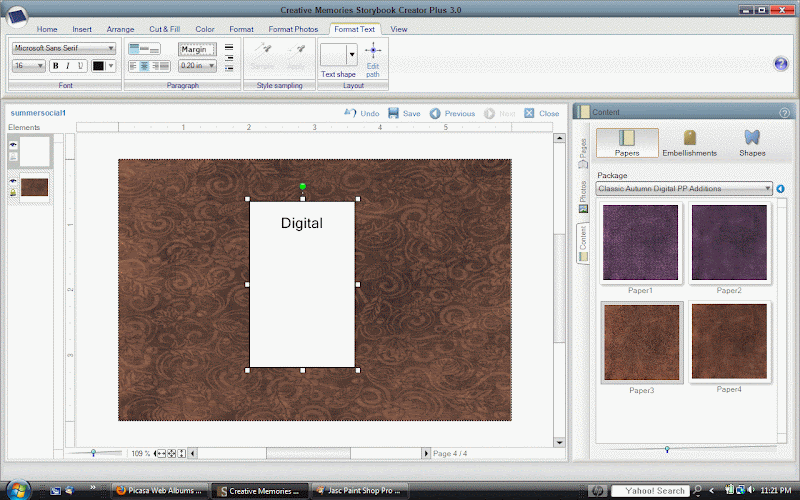
Step 5: Type your text in the text box - in this case, the word "Digital":

Step 6: Finally, click anywhere out side the text box. There you have it! It's a "D" filled with the word "Digital"!

Wednesday, October 7, 2009
Welcome to Digital Magic!
Welcome to Digital Magic! Here you'll find help maximizing your digital Memory Manager and StoryBook Creator Plus experience. You'll learn how to make your photographs and digital StoryBook albums truly magical!
Subscribe to:
Comments (Atom)
